
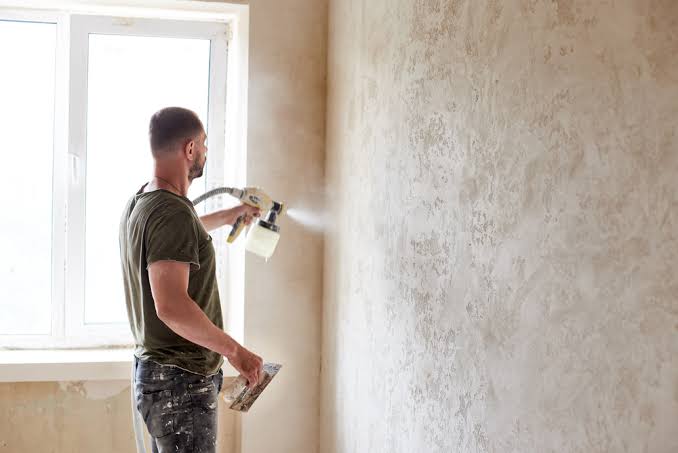
Adding texture to your walls is one of the easiest ways to elevate your home’s interiors without investing in expensive décor. From subtle finishes to bold statement walls, texture paint creates depth, character, and a premium look that ordinary paint cannot achieve. For first-time homeowners, a DIY texture painting project can be both rewarding and cost-effective when approached with the right preparation and techniques.
Whether you’re interested in elegant marble texture painting or the industrial charm of concrete texture, this guide will help you confidently tackle your first textured wall project.
Why Choose Texture Paint?
Unlike standard wall paint, texture paint adds dimension to surfaces, making walls visually appealing while helping conceal minor imperfections such as hairline cracks, uneven plaster, or patchwork repairs. It also enhances the overall ambiance of a room by introducing unique patterns and finishes.
Some key benefits include:
- Adds depth and sophistication to interiors.
- Covers minor wall flaws effectively.
- Offers greater durability than regular paint.
- Creates feature walls with minimal décor.
- Available in a variety of modern finishes to suit different design styles.
With careful application, textured walls can instantly transform bedrooms, living rooms, dining areas, and even home offices.
Gather the Right Tools
Before starting your project, ensure you have all the necessary materials.
Essential supplies include:
- Texture paint or texture compound
- Primer
- Paint roller
- Texture roller or sponge
- Putty knife or trowel
- Painter’s tape
- Sandpaper
- Paint tray
- Protective sheets
- Safety gloves and mask
Using quality tools ensures a smoother application and a more professional-looking finish.
Prepare the Surface Properly
Preparation is the foundation of every successful painting project.
Begin by cleaning the wall thoroughly to remove dust, grease, and loose particles. Fill any large cracks or holes with wall putty and sand the surface until smooth. Apply a high-quality primer to improve adhesion and create an even base for the texture paint.
Skipping this step may result in uneven texture, poor adhesion, or premature peeling.
Start with a Small Test Area
If you’re using texture paint for the first time, avoid covering an entire wall immediately. Practice on a small, less visible section or a spare board.
This allows you to:
- Understand the drying time.
- Adjust the amount of texture.
- Experiment with application pressure.
- Build confidence before working on larger surfaces.
Testing first reduces mistakes and helps you achieve consistent results.
Try Marble Texture Painting for a Luxurious Look
Marble texture painting is perfect for homeowners seeking an elegant and timeless appearance without the cost of natural marble.
To create this finish:
- Apply a smooth base coat in a light neutral shade.
- Use a sponge, feather, or fine brush to create soft, irregular veins with a darker complementary colour.
- Blend the veins gently while the paint is still slightly wet for a realistic marble effect.
- Finish with a protective clear coat for added durability and subtle sheen.
Marble textures work beautifully in living rooms, entrance foyers, feature walls, and dining spaces, adding a touch of luxury to modern interiors.
Create a Modern Concrete Texture
Industrial-style homes continue to grow in popularity, making concrete texture one of the most sought-after wall finishes.
To achieve this look:
- Apply a grey base coat evenly across the wall.
- Use a trowel or wide putty knife to spread the texture compound in overlapping strokes.
- Vary the pressure slightly to create natural imperfections similar to raw concrete.
- Once dry, lightly sand selected areas for a realistic weathered appearance.
Concrete textures pair exceptionally well with wooden furniture, black metal accents, and minimalist décor, creating a contemporary urban aesthetic.
Work in Small Sections
One common mistake beginners make is trying to texture an entire wall at once. Since textured finishes begin drying quickly, it’s best to work in manageable sections.
Complete one area before moving to the next while blending the edges to maintain a seamless appearance. This technique prevents visible joints and uneven patterns.
Avoid Overworking the Texture
Less is often more when applying textured finishes. Repeatedly going over the same area can flatten the design or create inconsistent patterns.
Apply the texture confidently, allow it to settle naturally, and resist the urge to keep adjusting once it begins drying.
Allow Proper Drying Time
Patience is essential for achieving a professional finish. Follow the manufacturer’s recommended drying time before applying additional coats or protective sealers.
Avoid touching the surface prematurely, as fingerprints or accidental smudges can become permanently visible.
Maintain Your Textured Walls
Textured walls require minimal maintenance when properly finished. Dust them regularly using a soft microfiber cloth or vacuum with a brush attachment. Clean stains gently with a damp sponge and mild detergent, avoiding abrasive scrubbers that may damage the surface.
Periodic inspection also helps identify any minor chips or cracks that can be repaired before they become more noticeable.
Final Thoughts
A DIY texture paint project is an excellent way for first-time homeowners to personalize their living spaces while enhancing visual appeal. Whether you choose the sophisticated elegance of marble texture painting or the contemporary charm of concrete texture, proper preparation, quality materials, and patient application are the keys to success.
By starting with simple techniques and working carefully, you can create stunning textured walls that add character, durability, and lasting value to your home. With a little practice and creativity, your walls can become standout design features that reflect your personal style while giving your interiors a premium, professionally finished look.